Build & Deploy Infrastructure via Helm Charts with OCM
Introduction
Let’s illustrate a very simple “Hello World” example application and show how to leverage OCM to build an application component containing a Helm Chart and an OCI Image and deploy it to a local kind k8s cluster.
The topics ocm localization and configuration are NOT part of this very simple example, but is covered in other tutorials.
As base we use the podinfo application from Stefan Prodan’s Github repo.
All files can be found here.
At the end of the tutorial you will have created one OCM component for your business application podinfo.
This component will be composed using the OCM guidelines and consist of multiple resources, alongside an OCI image and a Helm chart.
For building multiple components in one shot the “all-in-one” mechanism becomes handy.
Requirements
Building the Application Component Using OCM
First we build an OCM component which contains Helm Charts in different kind of formats. This 101 guide explains all possible formats a HelmChart resource can have in OCM, but in reality you’ll just pick the one most appropriate to you.
Prepare Helm Charts
We are leveraging Kubernetes deployments which often use Helm charts. The OCM specification supports Helm charts as artifact type. For this simple example, we will re-use existing open source community Helm charts.
The OCM CLI supports referencing Helm charts stored in an OCI registry or Helm chart repositories, as well as local archives or folders. The preferred option is to store Helm charts in an OCI registry or Helm repository, as this allows for easy sharing and versioning of the Helm charts.
Helm charts can be embedded in the component archive in four different ways:
- referenced in OCI registry
- referenced in Helm repository
- as local
*.tgzfile - as local folder containing a Helm Chart file
To demonstrate No. 3. and 4. we need a Helm chart on our local machine. For the sake of the this simplified guide, we download and unpack an already existing open source Helm chart for podinfo. In a real world application, this would be your own Helm chart. You will most likely store your own Helm charts within a git repository and leverage a CI/CD pipeline to build *.tgz Helm chart files in order to push them to your OCI registry or Helm repository.
Downloading Helm charts can easily be achieved using the Helm CLI:
helm repo add <repo-name> <helm-chart-repo-url>
helm pull --destination <target-dir> <repo-name/chart-name>
For the podinfo example:
helm repo add podinfo https://stefanprodan.github.io/podinfo
helm pull --destination . podinfo/podinfo
The Helm chart is then stored in the current working directory as podinfo-6.7.0.tgz and can be referenced as path from there in the component-constructor.yaml file (see below).
Unpack podinfo-6.7.0.tgz to simulate the process as if this helm chart is our own and not downloaded from a public repository:
tar -xzf podinfo-6.7.0.tgzInput Specification
The corresponding input file for building our component version (component-constructor.yaml) looks like:
# specify a schema to validate the configuration and get auto-completion in your editor
# yaml-language-server: $schema=https://ocm.software/schemas/configuration-schema.yaml
components:
# podinfo component
- name: ${COMPONENT_NAME_PREFIX}/podinfo
  labels:
  - name: "org.opencontainers.image.source"
    value: "https://github.com/stb1337/ocm-hello-world-v1"
  version: ${PODINFO_VERSION}
  provider:
    name: ${PROVIDER}
  resources:
  # Helm chart in OCI registry
  - name: helm-chart-external-oci
    type: helmChart
    version: ${PODINFO_VERSION}
    access:
      type: ociArtifact
      imageReference: ghcr.io/stefanprodan/charts/podinfo:${PODINFO_VERSION}
  # Helm Chart in Helm repository
  - name: helm-chart-external-helm-repo
    type: helmChart
    version: ${PODINFO_VERSION}
    access:
      type: helm
      helmChart: podinfo:${PODINFO_CHART_VERSION}
      helmRepository: https://stefanprodan.github.io/podinfo
  # Helm chart as local tgz file
  - name: helm-chart-local-tgz
    type: helmChart
    input:
      type: helm
      path: podinfo-${PODINFO_CHART_VERSION}.tgz
  # Helm chart as local folder
  - name: helm-chart-local-folder
    type: helmChart
    version: ${PODINFO_VERSION}
    input:
      type: dir
      path: ./podinfo/
  # Image referenced in the Helm chart
  - name: image
    type: ociImage
    version: ${PODINFO_VERSION}
    access:
      type: ociArtifact
      imageReference: ghcr.io/stefanprodan/podinfo:${PODINFO_VERSION}
Some frequently changing parameters have been extracted as variables. The OCM CLI uses
templating to fill them with values. The templating mechanism is described
here. For this example
we use the default template engine type subst.
Note the differences between the various components:
Building the Common Transport Archive (CTF)
From the input file component-constructor.yaml the common transport archive can be created with the
OCM CLI. We need to provide values for all variables, which can be passed in the
command line or stored in a file. For many variables, having a values file is more convenient.
The corresponding file settings.yaml may look like this:
VERSION: 0.0.1
NAME: ocm-hello-world-v1
COMPONENT_NAME_PREFIX: ocm.software
PROVIDER: stb1337
PODINFO_VERSION: 6.7.0
PODINFO_CHART_VERSION: 6.7.0
Create the transport archive with the following commands:
ocm add componentversions --create --file <ctf-target-dir> --settings settings.yaml component-constructor.yamlocm add componentversions --create --file ocm-hello-world --settings settings.yaml component-constructor.yaml
processing component-constructor.yaml...
processing document 1...
processing index 1
found 1 component
adding component ocm.software/podinfo:6.7.0...
adding resource helmChart: "name"="helm-chart-external-oci","version"="6.7.0"...
adding resource helmChart: "name"="helm-chart-external-helm-repo","version"="6.7.0"...
adding resource helmChart: "name"="helm-chart-local-tgz","version"="<componentversion>"...
adding resource helmChart: "name"="helm-chart-local-folder","version"="6.7.0"...
adding resource ociImage: "name"="image","version"="6.7.0"...You can view all component versions in a transport archive using the command:
ocm get componentversion -o yaml <ctf-target-dir>ocm get componentversion ./ocm-hello-world
COMPONENT VERSION PROVIDER
ocm.software/podinfo 6.7.0 stb1337You can store the transport archive in an OCI registry (this step needs a proper configuration of credentials for the OCM CLI):
ocm transfer ctf -f <ctf-target-dir> <oci-repo-url>Using the --copy-resources flag the OCM CLI will copy also copy all referenced resources to the OCI registry, making the resources part of the OCM component version, creating a self-contained component version.
ocm transfer ctf --copy-resources --enforce --overwrite ./ocm-hello-world OCIRegistry::ghcr.io/stb1337/ocm-hello-world-v1
transferring component "ocm.software/podinfo"...
  transferring version "ocm.software/podinfo:6.7.0"...
  ...resource 0 helm-chart-external-oci[helmChart](stefanprodan/charts/podinfo:6.7.0)...
  ...resource 1 helm-chart-external-helm-repo[helmChart]...
  ...resource 2 helm-chart-local-tgz[helmChart](ocm.software/podinfo/podinfo:6.7.0)...
  ...resource 3 helm-chart-local-folder[helmChart]...
  ...resource 4 image[ociImage](stefanprodan/podinfo:6.7.0)...
  ...adding component version...
Note: Be careful with the
-for--overwriteflag. This will replace existing component versions in the OCI registry. During development it is useful being able to overwrite existing component versions until something is ready for release. For released versions you should never use this flag! Released component versions should be immutable and should never be overwritten. They serve as source of truth for what the release is made of and should never be changed.
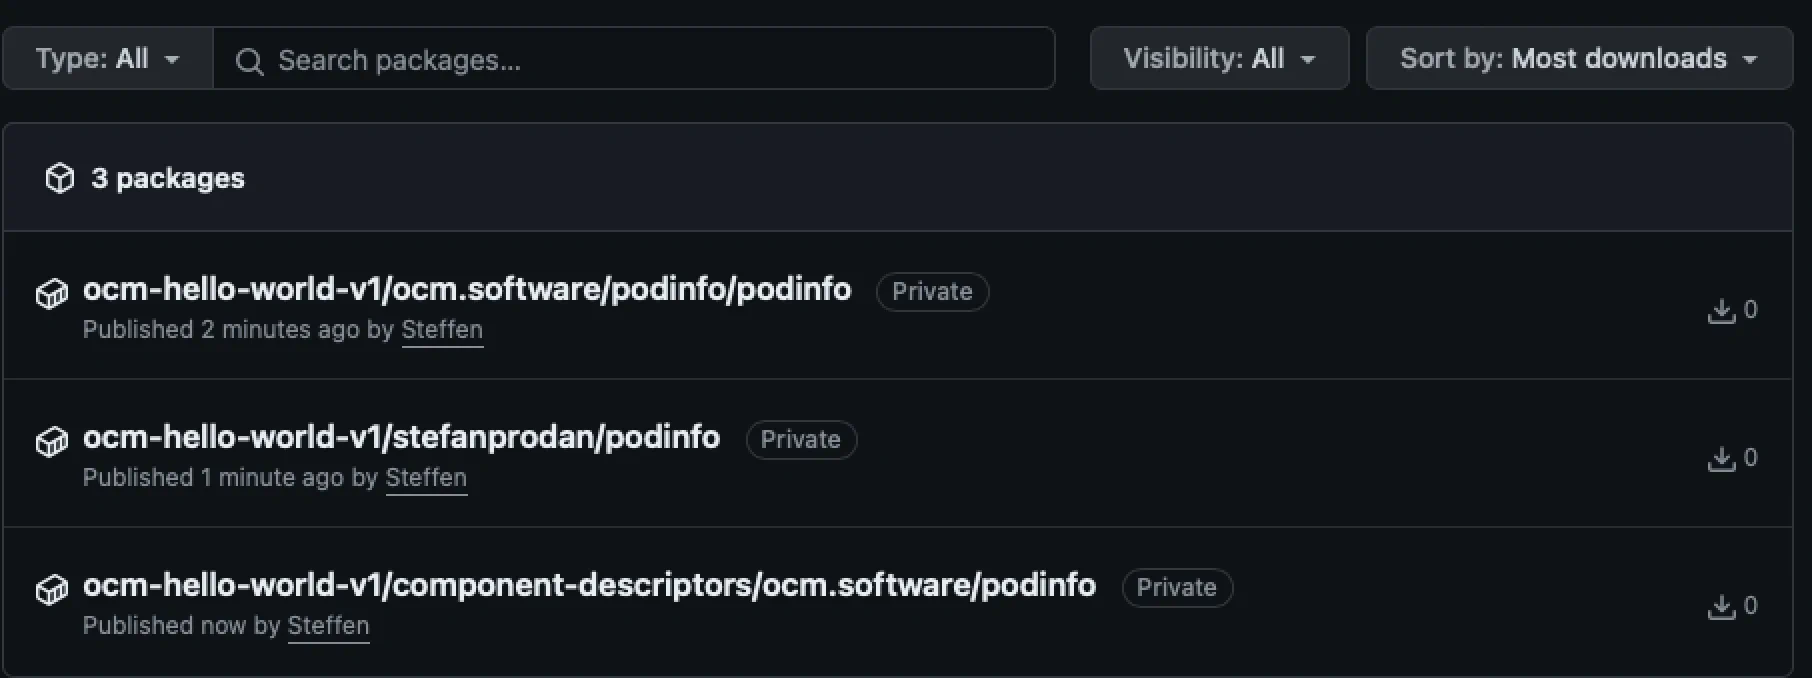
Package
Navigate to the overview of your OCI repository, which should list the following items:

Deploying the OCM Software Artifact
By this step we have created a transport archive containing all required parts (images and Helm charts) for installing the application. This archive is self-contained and can be transferred to an OCI registry with a single command from the OCM tooling. After pushing this archive to an OCI registry we have a shared location that can be used as a source of deployment without any external references. As an alternative, you can transport the archive using offline mechanisms (file transfer, USB-stick) and push it on a target location in an OCI registry.
To actually deploy the application we need to get access to the Helm charts contained in the archive. We can use the OCM CLI to retrieve their location. See the example below.
Setup Local Kind Cluster
Create local kind cluster on your local machine:
kind create cluster -n ocm-hello-world
Creating cluster "ocm-hello-world" ...
 ✓ Ensuring node image (kindest/node:v1.29.2) 🖼
 ✓ Preparing nodes 📦
 ✓ Writing configuration 📜
 ✓ Starting control-plane 🕹️
 ✓ Installing CNI 🔌
 ✓ Installing StorageClass 💾
Set kubectl context to "kind-ocm-hello-world"
You can now use your cluster with:

kubectl cluster-info --context kind-ocm-hello-world

Have a question, bug, or feature request? Let us know! https://kind.sigs.k8s.io/#community 🙂
Make sure that your current kubectl context is set to “kind-ocm-hello-world”:
kind export kubeconfig -n ocm-hello-world
Set kubectl context to "kind-ocm-hello-world"
kubectl cluster-info
Kubernetes control plane is running at https://127.0.0.1:52112
CoreDNS is running at https://127.0.0.1:52112/api/v1/namespaces/kube-system/services/kube-dns:dns/proxy

To further debug and diagnose cluster problems, use 'kubectl cluster-info dump'.
Install Flux:
flux install
✚ generating manifests
✔ manifests build completed
► installing components in flux-system namespace
CustomResourceDefinition/alerts.notification.toolkit.fluxcd.io created
CustomResourceDefinition/buckets.source.toolkit.fluxcd.io created
CustomResourceDefinition/gitrepositories.source.toolkit.fluxcd.io created
CustomResourceDefinition/helmcharts.source.toolkit.fluxcd.io created
CustomResourceDefinition/helmreleases.helm.toolkit.fluxcd.io created
CustomResourceDefinition/helmrepositories.source.toolkit.fluxcd.io created
CustomResourceDefinition/kustomizations.kustomize.toolkit.fluxcd.io created
CustomResourceDefinition/ocirepositories.source.toolkit.fluxcd.io created
CustomResourceDefinition/providers.notification.toolkit.fluxcd.io created
CustomResourceDefinition/receivers.notification.toolkit.fluxcd.io created
Namespace/flux-system created
ResourceQuota/flux-system/critical-pods-flux-system created
ServiceAccount/flux-system/helm-controller created
ServiceAccount/flux-system/kustomize-controller created
ServiceAccount/flux-system/notification-controller created
ServiceAccount/flux-system/source-controller created
ClusterRole/crd-controller-flux-system created
ClusterRole/flux-edit-flux-system created
ClusterRole/flux-view-flux-system created
ClusterRoleBinding/cluster-reconciler-flux-system created
ClusterRoleBinding/crd-controller-flux-system created
Service/flux-system/notification-controller created
Service/flux-system/source-controller created
Service/flux-system/webhook-receiver created
Deployment/flux-system/helm-controller created
Deployment/flux-system/kustomize-controller created
Deployment/flux-system/notification-controller created
Deployment/flux-system/source-controller created
NetworkPolicy/flux-system/allow-egress created
NetworkPolicy/flux-system/allow-scraping created
NetworkPolicy/flux-system/allow-webhooks created
◎ verifying installation
✔ helm-controller: deployment ready
✔ kustomize-controller: deployment ready
✔ notification-controller: deployment ready
✔ source-controller: deployment ready
✔ install finished
Install OCM controller:
ocm controller install
► running pre-install check
► installing prerequisites
► installing cert-manager with version v1.13.2
✔ successfully fetched install file
► applying to cluster...
► waiting for ocm deployment to be ready
✔ cert-manager successfully installed
► creating certificate for internal registry
✔ successfully installed prerequisites
► installing ocm-controller with version latest
► got latest version "v0.18.1"
✔ successfully fetched install file
► applying to cluster...
► waiting for ocm deployment to be ready
✔ ocm-controller successfully installed
Inspect Component Descriptor
Let’s assume that we have pushed the transport archive to an OCI registry. We need the identity of the component version and the location of the component-descriptors in the OCI registry:
ComponentVersion:
name: ocm.software/podinfo
version: 6.7.0
URL of OCI registry: ghcr.io/stb1337/ocm-hello-world-v1
It is convenient to put this into an environment variable:
export OCM_REPO=ghcr.io/stb1337/ocm-hello-world-v1Getting the component version 6.7.0 of the application with the OCM CLI:
ocm get componentversion --repo OCIRegistry::${OCM_REPO} ocm.software/podinfo:6.7.0 -o yaml---
component:
componentReferences: []
creationTime: "2024-03-21T15:55:18Z"
labels:
- name: org.opencontainers.image.source
value: https://github.com/stb1337/ocm-hello-world-v1
name: ocm.software/podinfo
provider: stb1337
repositoryContexts:
- baseUrl: ghcr.io
componentNameMapping: urlPath
subPath: stb1337/ocm-hello-world-v1
type: OCIRegistry
resources:
- access:
localReference: sha256:cf9318c4944f733f8ce925ca0b818cdae638dce4107a13c3395984bb86306c4b
mediaType: application/vnd.cncf.helm.chart.content.v1.tar+gzip
type: localBlob
digest:
hashAlgorithm: SHA-256
normalisationAlgorithm: genericBlobDigest/v1
value: cf9318c4944f733f8ce925ca0b818cdae638dce4107a13c3395984bb86306c4b
name: helm-chart-external
relation: external
type: helmChart
version: 6.7.0
- access:
imageReference: ghcr.io/stb1337/ocm-hello-world-v1/ocm.software/podinfo/podinfo:6.7.0
type: ociArtifact
digest:
hashAlgorithm: SHA-256
normalisationAlgorithm: ociArtifactDigest/v1
value: fa473086ce82810801785ec4ab70763fa81fcd971082035906a1695b9014c019
name: helm-chart-local-tgz
relation: local
type: helmChart
version: 6.7.0
- access:
localReference: sha256:8ff0604bfaebe6791ac4285c38a9f02771452497530367eeae49f1cf8594ca4c
mediaType: application/x-tar
type: localBlob
digest:
hashAlgorithm: SHA-256
normalisationAlgorithm: genericBlobDigest/v1
value: 8ff0604bfaebe6791ac4285c38a9f02771452497530367eeae49f1cf8594ca4c
name: helm-chart-local-folder
relation: local
type: helmChart
version: 6.7.0
- access:
localReference: sha256:4a05cbc915a171301efdaad863d7d1bb0bc9193730767eca9385c49361956863
mediaType: application/x-tgz
type: localBlob
digest:
hashAlgorithm: SHA-256
normalisationAlgorithm: genericBlobDigest/v1
value: 4a05cbc915a171301efdaad863d7d1bb0bc9193730767eca9385c49361956863
name: manifests
relation: local
type: dir
version: 6.7.0
- access:
imageReference: ghcr.io/stb1337/ocm-hello-world-v1/stefanprodan/podinfo:6.7.0
type: ociArtifact
digest:
hashAlgorithm: SHA-256
normalisationAlgorithm: ociArtifactDigest/v1
value: c04843c796025fbaa2574344994cb2461041b5e1d6b7a0de76b2b9fa46318e08
name: image
relation: external
type: ociImage
version: 6.7.0
sources: []
version: 6.7.0
meta:
schemaVersion: v2With this we can drill down to the installable Helm charts and the container images:
ocm get resource --repo OCIRegistry::${OCM_REPO} ocm.software/podinfo:6.7.0 -o wide
NAME                    VERSION IDENTITY TYPE      RELATION ACCESSTYPE  ACCESSSPEC
helm-chart-external     6.7.0            helmChart external localBlob   {"localReference":"sha256:cf9318c4944f733f8ce925ca0b818cdae638dce4107a13c3395984bb86306c4b","mediaType":"application/vnd.cncf.helm.chart.content.v1.tar+gzip"}
helm-chart-local-folder 6.7.0            helmChart local    localBlob   {"localReference":"sha256:8ff0604bfaebe6791ac4285c38a9f02771452497530367eeae49f1cf8594ca4c","mediaType":"application/x-tar"}
helm-chart-local-tgz    6.7.0            helmChart local    ociArtifact {"imageReference":"ghcr.io/stb1337/ocm-hello-world-v1/ocm.software/podinfo/podinfo:6.7.0"}
image                   6.7.0            ociImage  external ociArtifact {"imageReference":"ghcr.io/stb1337/ocm-hello-world-v1/stefanprodan/podinfo:6.7.0"}
Apply Kubernetes Manifest
Create file k8s-component-version/01-pod-info-kind.yaml with the following content:
#k8s-component-version/01-pod-info-kind.yaml
apiVersion: delivery.ocm.software/v1alpha1
kind: ComponentVersion
metadata:
  name: ocm-hello-world-podinfo
  namespace: ocm-system
spec:
  component: ocm.software/podinfo
  interval: 10s
  repository:
    url: ghcr.io/stb1337/ocm-hello-world-v1
    secretRef:
      name: ghcr-pull-secret
  version:
    semver: "6.7.0"
---
apiVersion: delivery.ocm.software/v1alpha1
kind: Resource
metadata:
  name: ocm-hello-world-podinfo-helm-chart-external
  namespace: ocm-system
spec:
  interval: 10s
  sourceRef:
    apiVersion: delivery.ocm.software/v1alpha1
    kind: ComponentVersion
    name: ocm-hello-world-podinfo
    namespace: ocm-system
    resourceRef:
      name: helm-chart-external-helm-repo
      version: "6.7.0"
---
apiVersion: delivery.ocm.software/v1alpha1
kind: FluxDeployer
metadata:
  name: ocm-hello-world-podinfo-helm-chart-external
  namespace: ocm-system
spec:
  interval: 10s
  sourceRef:
    apiVersion: delivery.ocm.software/v1alpha1
    kind: Resource
    name: ocm-hello-world-podinfo-helm-chart-external
  helmReleaseTemplate:
    values:
      replicaCount: 3
      image:
        repository: ghcr.io/stb1337/ocm-hello-world-v1/stefanprodan/podinfo
      ui:
        color: "#8F00FF"
        message: "Hello from remote referenced Helm Chart"
      serviceAccount:
        enabled: true
        name: "sa-podinfo-ghcr-io-1"
        imagePullSecrets:
        - name: pull-secret
    interval: 10s
    releaseName: "podinfo-helm-chart-external"
    targetNamespace: default
---
apiVersion: delivery.ocm.software/v1alpha1
kind: Resource
metadata:
  name: ocm-hello-world-podinfo-helm-chart-local-tgz
  namespace: ocm-system
spec:
  interval: 10s
  sourceRef:
    apiVersion: delivery.ocm.software/v1alpha1
    kind: ComponentVersion
    name: ocm-hello-world-podinfo
    namespace: ocm-system
    resourceRef:
      name: helm-chart-local-tgz
      version: "6.7.0"
---
apiVersion: delivery.ocm.software/v1alpha1
kind: FluxDeployer
metadata:
  name: ocm-hello-world-podinfo-helm-chart-local-tgz
  namespace: ocm-system
spec:
  interval: 10s
  sourceRef:
    apiVersion: delivery.ocm.software/v1alpha1
    kind: Resource
    name: ocm-hello-world-podinfo-helm-chart-local-tgz
  helmReleaseTemplate:
    values:
      replicaCount: 2
      image:
        repository: ghcr.io/stb1337/ocm-hello-world-v1/stefanprodan/podinfo
      ui:
        color: "#FFC0CB"
        message: "Hello from local .tar file Helm Chart"
      serviceAccount:
        enabled: true
        name: "sa-podinfo-ghcr-io-2"
        imagePullSecrets:
        - name: pull-secret
    interval: 10s
    releaseName: "podinfo-helm-chart-local-tgz"
    targetNamespace: default
---
apiVersion: delivery.ocm.software/v1alpha1
kind: Resource
metadata:
  name: ocm-hello-world-podinfo-image
  namespace: ocm-system
spec:
  interval: 10s
  sourceRef:
    apiVersion: delivery.ocm.software/v1alpha1
    kind: ComponentVersion
    name: ocm-hello-world-podinfo
    namespace: ocm-system
    resourceRef:
      name: image
      version: "6.7.0"
Create two Kubernetes secrets in order for OCM and Kubernetes to pull from your private OCI registry:
export GITHUB_USER=.. && export GITHUB_TOKEN=ghp_.... && export GITHUB_USER_EMAIL=steffen....

kubectl create secret docker-registry pull-secret -n default \
    --docker-server=ghcr.io \
    --docker-username=$GITHUB_USER \
    --docker-password=$GITHUB_TOKEN \
    --docker-email=$GITHUB_USER_EMAIL

kubectl create secret generic ghcr-pull-secret -n ocm-system \
    --from-literal=username=$GITHUB_USER \
    --from-literal=password=$GITHUB_TOKEN
Apply the manifest to your local kind cluster:
k apply -f k8s-component-version/01-pod-info-kind.yaml
componentversion.delivery.ocm.software/ocm-hello-world-podinfo created
resource.delivery.ocm.software/ocm-hello-world-podinfo-helm-chart-external created
fluxdeployer.delivery.ocm.software/ocm-hello-world-podinfo-helm-chart-external created
resource.delivery.ocm.software/ocm-hello-world-podinfo-helm-chart-local-tgz created
fluxdeployer.delivery.ocm.software/ocm-hello-world-podinfo-helm-chart-local-tgz created
resource.delivery.ocm.software/ocm-hello-world-podinfo-image created
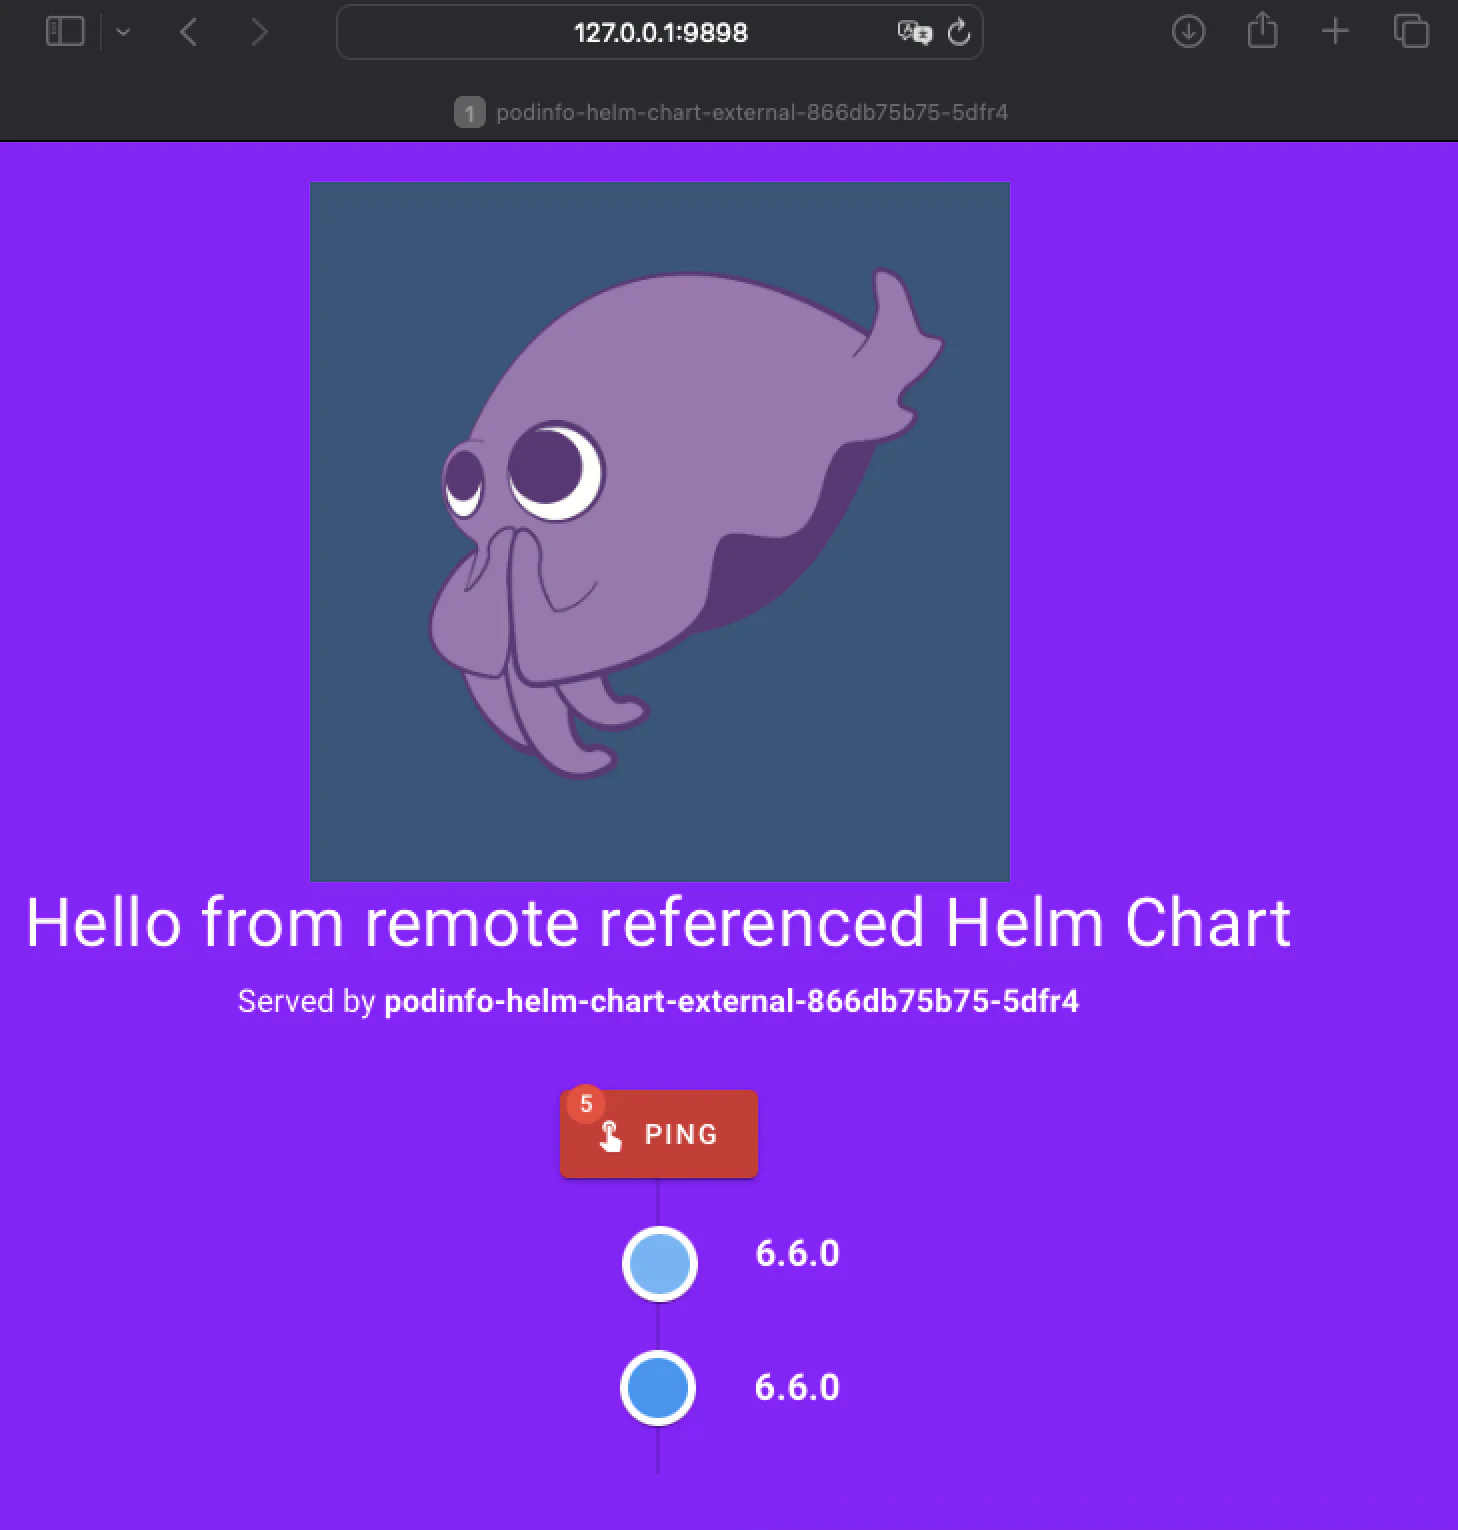
kubectl port-forward service/podinfo-helm-chart-external -n default 9898:9898
Forwarding from 127.0.0.1:9898 -> 9898
Forwarding from [::1]:9898 -> 9898
Handling connection for 9898
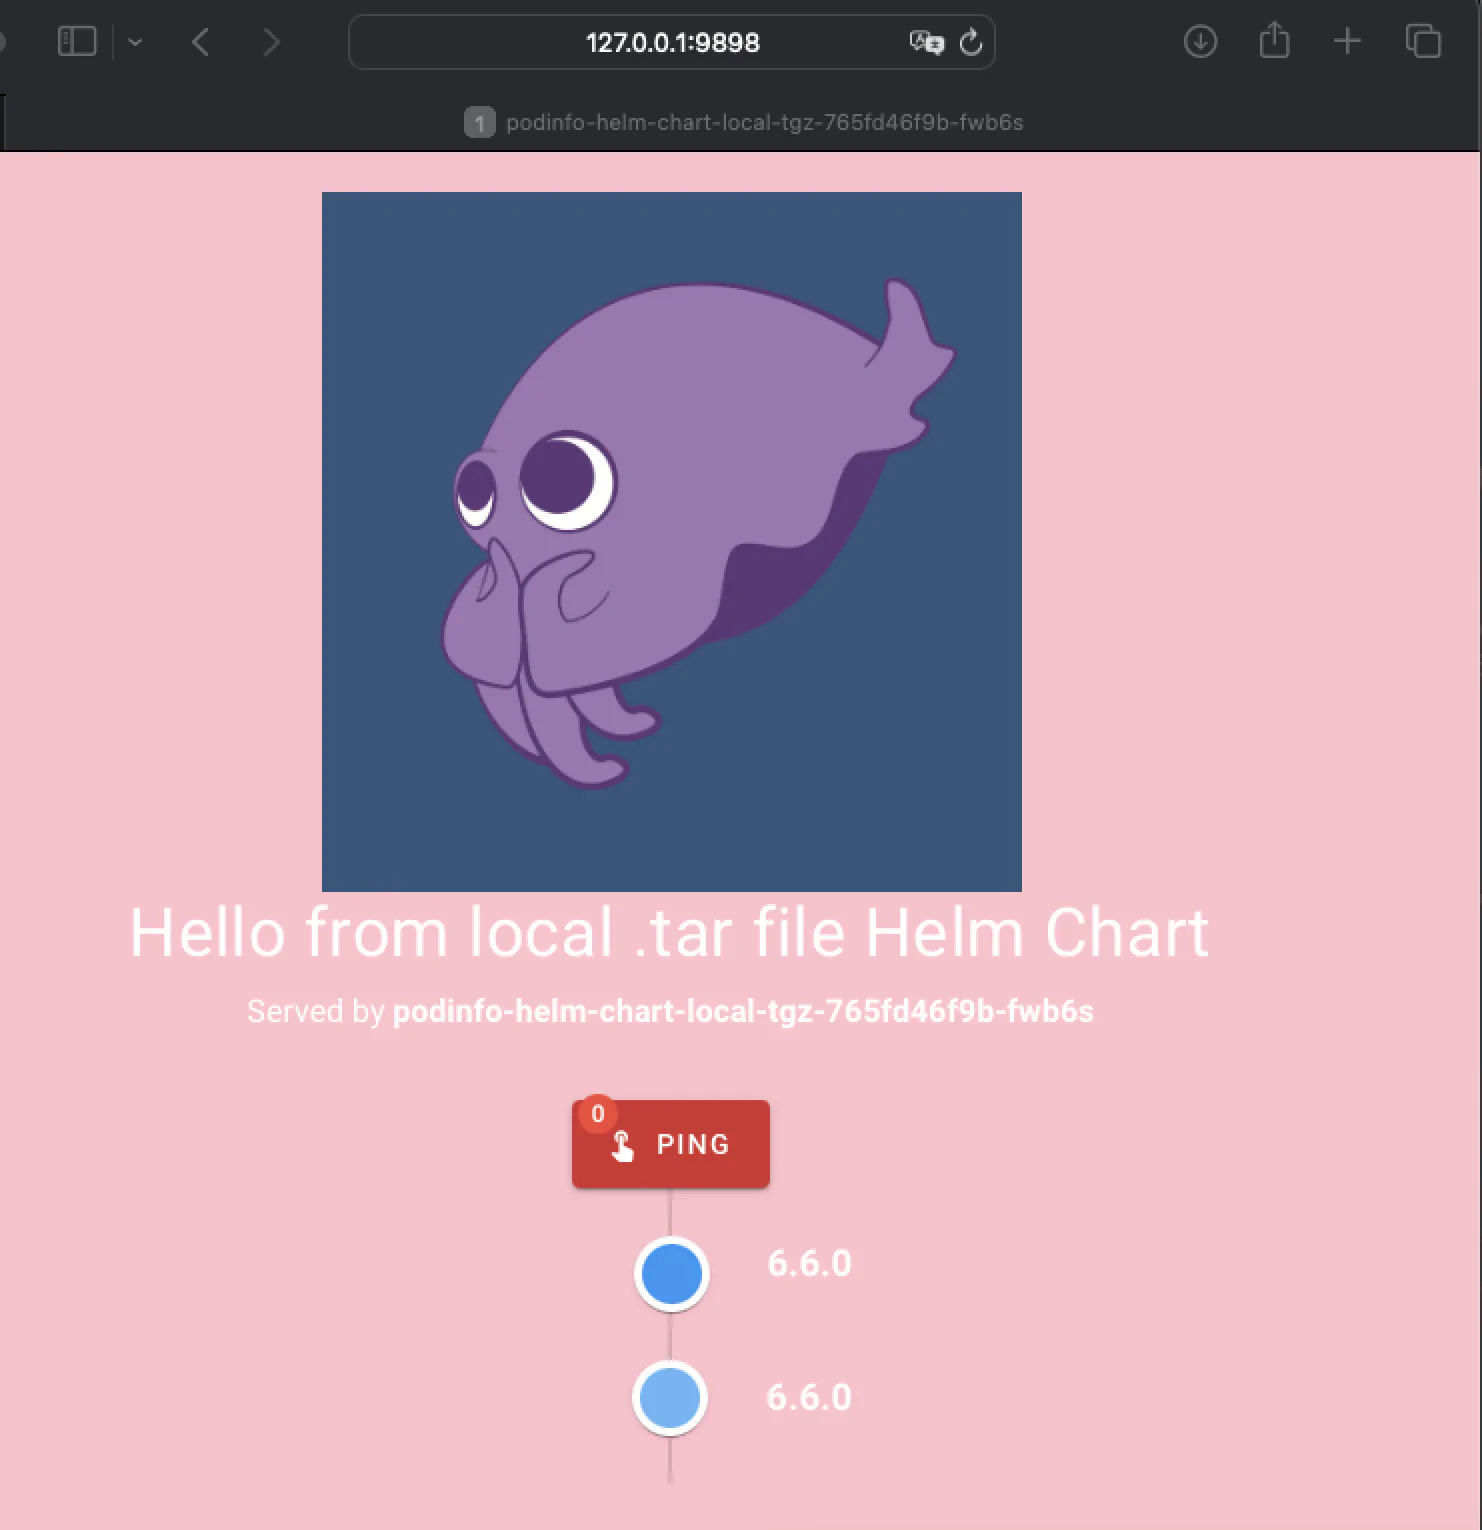
kubectl port-forward service/podinfo-helm-chart-local-tgz -n default 9898:9898
Forwarding from 127.0.0.1:9898 -> 9898
Forwarding from [::1]:9898 -> 9898
Handling connection for 9898
